Day 10 ~ 12:はじめての Git
/
10日目
First
what is Git
プログラムのソースコードなどの変更履歴を記録・追跡するための分散型バージョン管理システム
prepare to use Git
git init共同開発の流れ
- コード変更
- 共有準備
- 共有
コマンド
共有する準備
# 共有したいファイルを選択git add index.htmlコミット
選択したファイルを記録する
# git commit -m "appropriate message"git commit -m "Create index.html"共有
リモートを登録
リモートとは、Git 共有ファイルの置き場所で、origin はリモート名のこと
git remote add origin URL名push: リモートにファイルアップロード
git putsh origin mastaerpull: リモート上のファイルをDL
git pull origin masterその他コマンド
git status # display changed filesgit diff # displya changed codes diffgit log # display commit historygit log -p # diplay commit history and changed contents11日目
Github上でリポジトリ作成
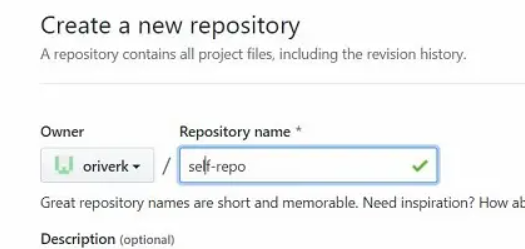
ローカルリポジトリ作成
echo "# self-repo" >> README.mdgit initgit add README.mdgit commit -m "first commit"git remote add origin https://github.com/oriverk/self-repo.gitgit push -u origin master# =># Branch 'master' set up to track remote branch 'master' from 'origin'.Gitリモートの確認
git remote -v# =># origin https://github.com/oriverk/self-repo.git (fetch)# origin https://github.com/oriverk/self-repo.git (push)Git log
git log# =># commit e2282c28ea661e588143201d9109ed9572f3d276 (HEAD -> master, origin/master)# Author: oriverk <[email protected]># Date: Wed Mar 20 22:09:38 2019 +0000自分で push してみる
touch tes1.txttouch tes2.txt
git add tes1.txtgit add tes2.txtgit commit -m "second commit"
# =># [master 5b5b220] second commit# 2 files changed, 0 insertions(+), 0 deletions(-)# create mode 100644 tes1.txt# create mode 100644 tes2.txt
git log# =># commit 5b5b220fce07f6772b9aeeca1fe60d9ba0e63c74 (HEAD -> master)# Author: oriverk <[email protected]># Date: Wed Mar 20 22:25:49 2019 +0000# second commit
git push origin master# =># Counting objects: 3, done.# Compressing objects: 100% (2/2), done.# Writing objects: 100% (3/3), 283 bytes | 141.00 KiB/s, done.# Total 3 (delta 0), reused 0 (delta 0)# To https://github.com/oriverk/self-repo.git# e2282c2..5b5b220 master -> master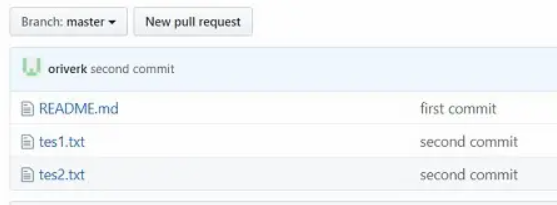
interactive mode
対話モードの呼び出し
git add -i # interactive mode# =># 1: status 2: update 3: revert 4: add untracked# 5: patch 6: diff 7: quit 8: help更新分をステージ
git add -i# select no5( patch ) and then select index.txt# => diplay diff
# githubに反映git commit -m "cat pass"git push origin masterファイルを戻す
rm tes1.txt# let file go back to previous ver.git checkout tes1.txt
# let file go back to specific ver. filegit log# commit 5b5b220fce07f6772b9aeeca1fe60d9ba0e63c74# Author: oriverk <[email protected]># Date: Wed Mar 20 22:25:49 2019 +0000
# let file go back to the "second commit" ver. tes1.txtgit checkout 5b5b220fce07f6772b9aeeca1fe60d9ba0e63c7 tes1.txt
# to the latest ver.git reset --hard HEAD# =># HEAD is now at 48bfffa cat pass# 最新版なので、tes1.txtも"cat pass"のバージョンに戻ってるブランチの確認、作成
現在のブランチを確認
git branch -v# =># master 48bfffa cat pass新規のブランチ作成
git switch -c other-branedit file and then push to other-bran
cat /etc/mysql/conf.d/mysql.cnf >> tes1.txtcat /etc/apache2/conf-available/javascript-common.conf >> tes2.txtcat /etc/passwd >> tes3.txtcat /etc/nsswitch.conf >> tes4.txt
git commit -m :"for other-bran"git push origin other-branリモートの変更をローカルに反映
# masterブランチに移動git checkout master# 反映git pull origin master認証情報の追加
push 時に毎回パスワ等聞かれるので、作成する
git config --global --edit# ユーザ名とメールを記入し、コメントインsshのkeyを作成
すでに授業で作成したので、実行はパス
cat ~/.ssh/id_rsa.pubリポジトリの Setting 内の DeployKeys に上の cat の結果をコピーアンドペースト これで、push を、パスワなどを聞かれずに実行できる。
12日目
ブランチの確認
# 現在のブランチを確認git branch -l# 実行 master* new-branch-jaji
# 現在のブランチとその情報を確認git branch -v# 実行 master 50dc6c7 added* new-branch-joji be070c0 他のフィアルを追加
# リモートを含む、ブランチを確認git fetchgit branch -a
# =># vagrant@vagrant:~/cebu_lessons/mactan-repo$ git branch -a# master# * new-branch-joji# remotes/origin/master# remotes/origin/new-branch-joji# remotes/origin/test-repoGit fetch
リモートブランチの最新の履歴だけを取得 これをした状態で Git merge をすると、git pull と同じ履歴になる
git pull = git fetch + git pull